

Build log: MechMini2
I have been in love with the 40% keyboard size for some time now and I have also added a few of them to my ever-expanding family of keyboards.
Back in 2017 I saw a post on Reddit about a group-buy for the MechMini 2 – a super sleek 40% keyboard created by /u/evolize from mechkeys.ca. I just had to buy it.
It would be my first keyboard with RGB (I have never been a huge fan of this sort of bling-bling), so I wanted the keyboard to have switches where the RGB light from the underglow could shine through. After a bit of chatting on the mechkeys.ca discord server I ended up ordering the Zealio Purple Tactile 78g switches directly from Zealpc.
While waiting for the things to arrive I got waay too much to do at work and didn’t have much time for keyboard building anymore.
Let the work begin
Built: July 2018
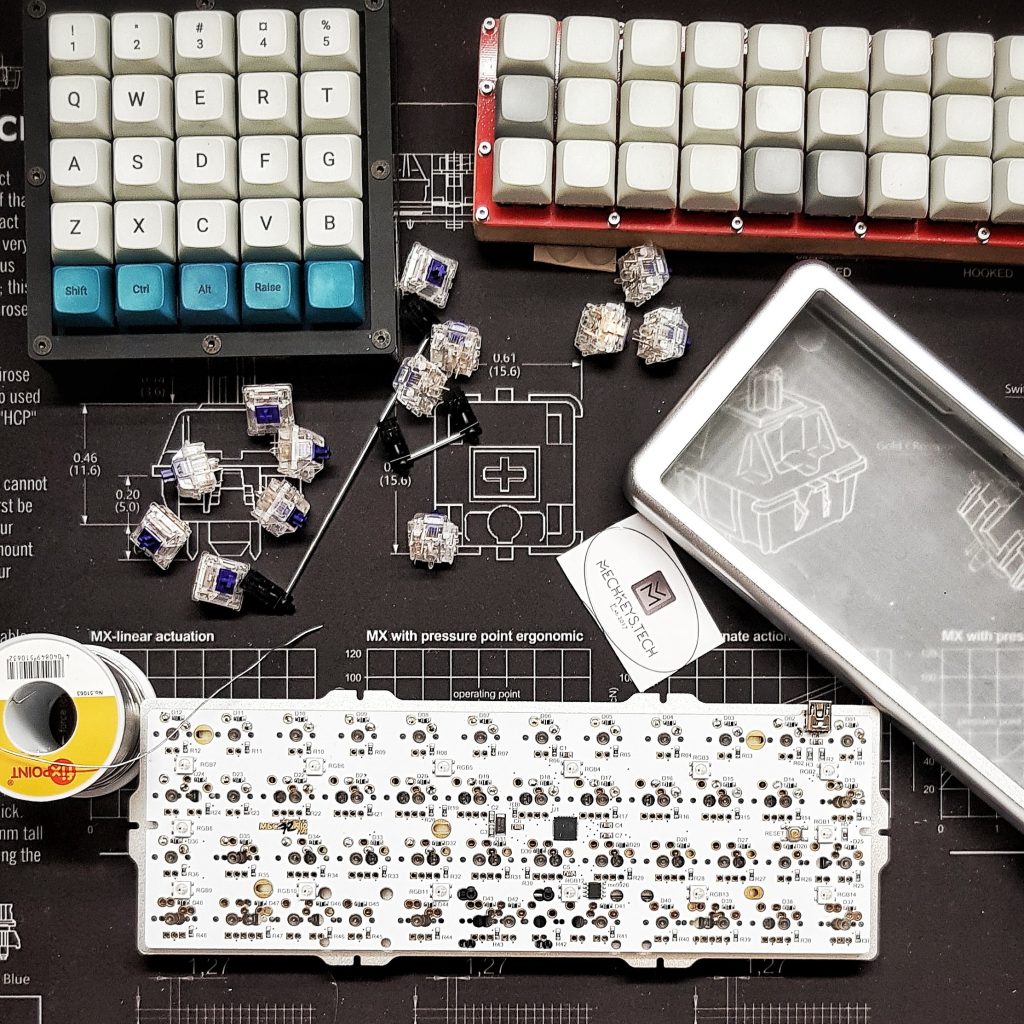
Fast forward one year and I finally found the time to build this beauty a week ago. I have to say sorry that I did not get so many pictures of the process, but you will understand why when you read the below description.
First thing I had to do was to decide if I wanted the layout to be staggered or ortho-linear – I went with ortho as that is really my favorite these days (also I had another 40% keyboard to build at the same time).
Since the mechmini2 PCB comes with diodes and resistors pre-soldered, the build turned out to be an easy one. The thing that took the most time was actually to get the plate and the pcb pushed fully together around the switches.
It was a really tight fit around the stem and fixing points but I finally got all switches to be fully pushed down (after I realized that one of the switches had a bent pin and had to be pulled off and put on again).
Soldering switches is always a fun, easy tasks. For small keyboards like this it takes me maybe 5 mins in total. I tested the keyboard to see if all switches worked. Again mechkeys.ca made it easy as the keyboard had the qmk firmware preinstalled. Everything worked and I could proceed to add the back-light LEDs.
Looking though my electric components I found, what I thought was white LEDs. I added a few to test and it turned out to be red ones (they had clear housing so I could not tell until I turned them on). It actually looked quite nice with red, so I decided to continue to add them. This is a good task to do while relaxing in front of the TV or twitch channels. Sticking them through the wholes one by one and bending the legs slightly so they stick.
TIP: always remember that the LED is places such that the Cathode goes through the hole usually marked with a square around it. The Cathode is the shorter of the two legs of the diode.
Back to the soldering iron again to get those LEDs ready….God I just love soldering on my keyboards! (why does it have to be so long between keyboard projects these days).

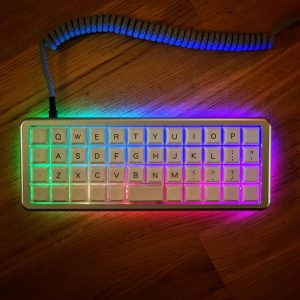
The RGB in all its glory
Switches are very close to the Cherry MX clears I use on most of my keyboards so I felt right at home when typing on the keys.
I had planned to used som dark stealth SA keycaps for this keyboard (thought that red+dark would look cool) but I had forgotten that they were sculpted and didn’t fit well with the layout of the ortho 40%. Luckily I always have a few sets of simple DSA and XDA sets in stock and opted for an all white version (not the best quality but it gets the job done). The result was very nice.
The result
The final result was almost better than expected. The RGB turned out to be quite funny to play with (though I will probably have it turned off most of the time) and the back-light in red is just gorgeous. It does work the best with RGB turned off though – or simply put in a mode where it has the same red color as the backlight.
I think the Mechmini2 will be one of my go-to keyboards when I want to have a bit of fun. It is a bit on the heavy side for travel but would be cool for late-night work in the dark where I want to sit with the keyboard on my legs. and still have some light around it.
The keyboard is now part of the family tree and can be seen here.
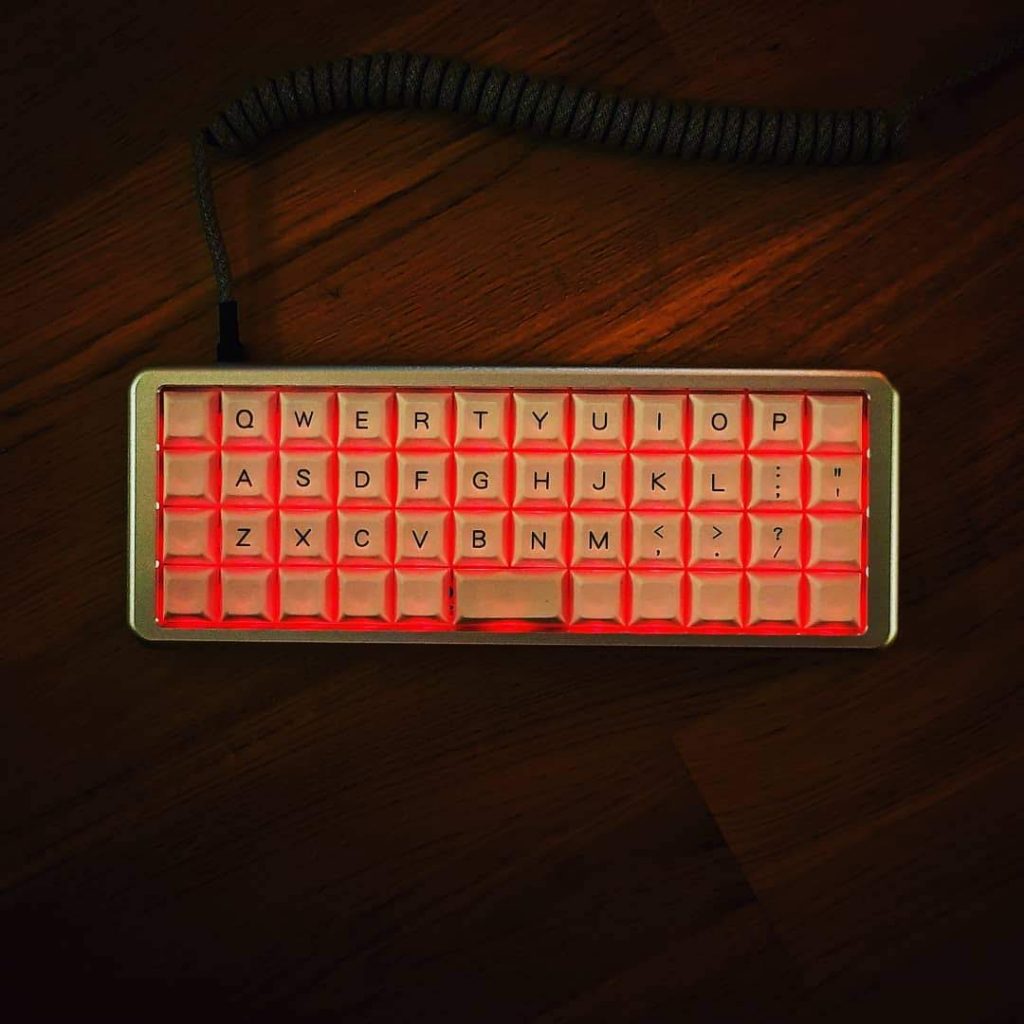
The Red back-light turned on and RGB turned off. There is a bit of shine-through on the keycaps, but I can live with that.
